(This post is later than the finished creation date but at least now I can attest to its durability!) Of the three dress I have made thus far, Butterick 5917 and the Butterick Pattern Mashup being the other two, this dress pattern has to be my favorite! Perhaps it was the ease of the pattern, the lack of lining to wrestle with, the great colour or the fact that this is one of the quickest turn around of fabric in my stash. Only two months in my collection...not even enough time to collect dust! Which ever the case, I really wish I had more money right now to go buy more jersey knit fabric and make a couple other versions of this dress. I made dress view D with a light heather green, four-way jersey knit thereby eliminating the need for a zipper. The buttons match the fabric better in person than has been captured by the photographs and were on clearance for 50 cents!
Up close view of fabric and buttons.
The only major hurdle in creating this dress was in attaching the collar, where the bulkiness of the fabric at the front point made for a couple of seam rips before getting a decent look. Decent meaning: "I want to get this project finished and wear the dress, despite the unevenness of the collar front." Collars are just something I need to work more on...
Faux front buttons with snaps behind, as I disliked the trial run of buttonholes I created on scrap fabric.
I also love that the weave and weight of the material is thick enough that it does not need lining or a slip to be worn underneath. I can wear this to the office or out running errands, albeit it is a little too thick to wear at the height of summer. The style of the pattern and hint of army green in the fabric color reminds me of the 1940s dresses, which I love! When I am next able to get back to my sewing projects, I hope to make more 1940s inspired dresses. The only other thing to point out is that I kept the front pleat basting stitches in place but removed the back basting stitches, as the back fabric needs to have room/movement for my supple ass. ...Oh, and I added a tiny bit of gathering to the top of the sleeves.
Back-side view of pleats without stay stitches.
Cost of Materials: Heather green jersey knit, 2.33 yards (2.13 m), $9.26 including tax La Mode set of three green button, 9/16" (13 mm) diameter, on clearance for $0.50, excluding tax Snaps, from stash, probably $0.10 Interfacing, from stash, probably $0.10 Guttermann 100 m spools of thread (2), color # 625, sale price $2.16 including tax 4 Serger grey cone threads, from stash but originally costing $4.30 with tax McCall's pattern, from stash, originally $1.99 without tax Total Cost = $11.49
So you are ready to sew your PU coated 100% nylon, aka stretch taffeta! Well let's get you started.
Step 1:start with a clean machine.
I cannot emphasis this enough and really should be done after every sewing project.
Step 2:do trial runs with scrap fabric.
Trust me on this one; whatever stitch method you think you might want to use, try it out on pieces you don't care about before using the fabric you paid good money for! This will get you use to the fabric and hopefully get out all the kinks ahead of time.
Step 3: set the dials to sew!
For this fabric, on a regular sewing machine you will want a longer stitch length, 3-3.5 mm, and decreased tension (see photo in Step 4). Were the fabric to be coated and not stretchable, you would want to increase the thread tension. Play around with the tension to find the best results for your machine and fabric stretch. The same should be done with a serger. Step 4: if you don't have a serger...
That's okay! According to Ebay's Guide to Sewing Water Repellent or Waterproof Fabrics, "Most coated fabrics will not fray and do not require serging, pinking or finishing. Lighter nylons and uncoated fabrics will however fray quite easily and should be finished." The text does not say explicitly how the fabric should be finished.
If you do not want all your seams to be serged or you have seams that need to retain their stretch-ability, I recommend using a vari-overlock seam. This type of seam will allow the fabric to stretch whilst not breaking the thread or stitches. Consult your machine manual to obtain the correct setting.
Left: Straight stitches from length 4, 3.5 and 3 mm; Right: Vari-overlock seam with stitch lengths 3, 3.5 and 4 mm.
Having not discovered the interfacing/tissue paper tool until after I was finished, I created a majority of my seam using the vari-overlock seam and did not notice any fraying after the wash. ...Though it may have contributed to some of my lighter garments turning a bit grey.
Step 5: serging your garment.
As with regular sewing, do a test run to determine the necessary tension but keep the stitch length on the longer side.
Here is a side-by-side comparison of serged PU coated nylon fabric with and without stabilizer. The hot pink tissue paper from Victoria Secret works in a pinch, though may not be the color you want left as part of your garment. With any luck, it should come out in the wash.
Without any kind of stabilizer, the serger has difficult time maintaining the seam, often bunching up the fabric between the needles and sometimes causing the needle thread to break. Using three threads without stabilizer fared little better.
Tissue paper stabilizer vs non-stabilized serger seams.
Because the needles puncture booth the fabric and the tissue paper when serging, the tissue paper easily gives way from the seam without hassle.
This is what you are left with after removing the tissue paper.
Step 6: finish project and clean machine!
Hopefully your project has gone well with no major difficulties and this mini-series has been useful.
See anything in error? Know of a better method or tip? Post a comment below or send me an email. Everything I know about PU coated stretch taffeta I have learned by doing and am in NO way an expert.
So what do you need to have before you getting started sewing your PU coated 100% nylon, aka stretch taffeta? Most of what I have learned has been through trial and error, with the occasional nudge in the right direction from Ebay'sGuide to Sewing Water Repellent or Waterproof Fabrics.
Pins Pin above the seam allowance (between the fabric edge and your seam), if you must pin.
Seam ripped punctures on both sides of fabric.
Once the material is punctured, either by pins or needle, it leaves a hole where water can get in. Holes can be covered with sealant but who wants sealant on an every day garment. This also means that, if you can, try not to seam rip you garment. If you are unsure about the fit, try practicing with material that is of similar weight and stretch as the garment you want to make with the PU coated nylon. Another option is to buy extra material of the "stretch taffeta" to give you a bit of wiggle room for error(s). Machine Tools
Clockwise from top left: machine oil, lint roller, nylon brush and scrap fabric.
When this fabric is punctured or is being cut, as by a serger, there will be a lot of lint. And being nylon, it likes to attach itself every where! You may sew in one room and come to find the lint on the other side of the house, especially if you take breaks during sewing. So you will need to keep the following handy: nylon lint brush, machine oil, scrap fabric to wipe excess oil, lint roller or masking tape, vacuum cleaner...I know I am forgetting something. Use the nylon brush liberally, whether on regular sewing machine or serger. You may also find your machine needs a quick wipe and oiling after an hour or two of sewing with the "stretch taffeta". This will help if you are starting to see snagging with the thread or fabric. Thread Whilst I did not have the money to buy anything other than 100% polyester thread, you can manage PU coated 100% nylon with this thread. There are somethings you may need to do differently than your normal projects, however, I have also found them useful for sewing with stretch jersey.
According to the user plrlegal on "Sew What's New" message board (last comment on the first page), she says (with my emphasis):
I actually would use a 3-3.5 mm stitch (8-10 stitches per inch on my Pfaff 4.0) and a silk wrapped polyester thread. Taffeta is one of the fabrics that if you use small stitches on it, it will tend to pucker, especially with polyester thread that has been tightly wound at high speed onto a bobbin. Polyester thread is one of the threads when tightly wound a high speed onto a bobbin will stretch and then when it is sewn into a seam will shrink back to its original length, thus causing the puckering in garment seams. If it is at all possible, you should wound polyester onto a bobbin at a lower speed to prevent stretching.
Repeat the manta: Wind polyester onto bobbin at a lower speed. Wind polyester onto bobbin at a lower speed. Wind polyester onto bobbin at a lower speed. (Plus taking more time to wind the bobbin means you won't have time to get to those pesky dishes! That will have to be someone else's job.) Needles
Use sharp needles and change them often, at least every 8 hours of sewing! The stretch to the "taffeta", even with the PU coating, acts like jersey knit but is more susceptible to punctures. If you have ever worked with swimwear, you know what I mean.
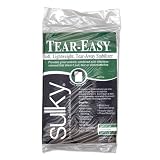
I have found that ball point jersey needles metric size 70 or imperial size 10 do the least amount of damage to the fabric. Since the fabric is so fine, I would not use any of the other jersey needle sizes larger than this. On the same note, do NOT use the microtex needles of any size on PU coated stretch taffeta. These needles are much too sharp and have a tendency to snag the fabric and knot the thread. Pressure Foot Unlike PUL (polyurethane laminate) or vinyl fabric, there is NO major slip resistance to PU coated nylon! This means you do not have to spend extra money on a special pressure foot just for your project. (You can pause here for your happy dance...) Interfacing Whilst you may not need a special pressure foot, for more difficult stitches or serging, you will need interfacing or tissue paper to stabilize the stitches/seams. This is especially true if you are sewing only pieces of the "stretch taffeta" together. Sulky's Tear-Easy would work or even left over tissue paper from gift wrapping. I had some extra tissue paper from the Victoria Secret's free panties gift coupon and had no trouble sewing with that, as you will see in the next post. Continue this series with: PU Coated Nylon Sewing Tips - Part 1: The Material PU Coated Nylon Sewing Tips - Part 3: The Method See anything in error? Know of a better method or tip? Post a comment below or send me an email. Everything I know about PU coated stretch taffeta I have learned by doing and am in NO way an expert.
I have recently worked with polyurethane coated 100% nylon or "stretch taffeta" as a lining for a dress (read about it here) and faced many a stumbling snafu. Granted I did not exactly utilized this fabric as it was designed for but that is more of a learning curve for me than anything else. I hope you find these postings useful. What Is "Stretch Taffeta" With A PU Coating?
I am glad you asked! Stretch taffeta with a PU coating is not the stretch taffeta you find in the wedding/special occasion fabric section of your local fabric store. It is a two-way, horizontal stretch fabric consisting of 100% nylon with a special coating on the wrong side. That coating is a polyurethane (PU) which makes the material water resistant whilst still being flexible and light weight. The "right side" of the stretch taffeta is not coated and retains the shiny nylon look. This distinct characteristic of the fabric, plus it's light weight, drapability and wringle-free-ness (if that is even a word), make it an ideal choice for outdoor active wear.
Wrong side, PU coating on the left; right side, 100% shiny nylon on the right.
What "Stretch Taffeta" With A PU Coating Is NOT!
This particular stretch taffeta is NOT polyurethane laminate or PUL. PUL looks and acts more like vinyl fabric, albeit a bit more flexible as it is made with 100% polyester knit fabric. It is used by home sewers primarily for homemade diapers and reusable lunch baggies.
If you are looking for information on how to work with PUL, try: Celtic Cloths' Description of PUL and Sew4Home's Guide to Sewing with PUL
Stretch taffeta is also NOT the same as water-resistant taffeta, a popular fabric in the late 1980s (?) for light-weight rain jackets. These days polyester taffeta that has some water-resistance is found in linings of high end sleeping bags. There is a similar feel of this type of fabric to the PU coated stretch taffeta but you will find that water-resistant taffeta, whether of nylon or polyester material, is generally stiffer and can make a bit of a crunching sound.
Even the foldable, outdoor chairs are made of polyethylene foam padding and not polyurethane.
Example of ripstop nylon fabric
Nor is it ripstop with a PU coating despite both being made of 100% nylon. Ripstop is a special weave of nylon that stops rips from spreading. This type of fabric is utilized by outdoor enthusiasts who like making their own gear, being not limited to tents, packs and clothing. This is where all the non-tailor sewing men hang out...and what I have been missing out on!
How To Treat The Fabric
According to the bolt, PU coated 100% nylon can be: machine washed, gentle cycle, cold water with nonchlorine bleach. Reshape, lay flat to dry, do not iron. What they do not say, and which is VERY important, is that "stretch taffeta" is NOT color resistant. Most white or light colored fabric should be washed separately, else risk getting slightly grey clothing.
See anything in error? Know of a better method or tip? Post a comment below or send me an email. Everything I know about PU coated stretch taffeta I have learned by doing and am in NO way an expert.
On the heals of creating Butterick 5917 dress, I continued with another of Butterick's dress patterns: 5983. I love the bodice of view A and C but did not like any of the options for the skirt. Having great success with the previous Butterick dress, despite the fabric color choice, I saw no reason for not getting a little Doctor Frankenstein on the pattern.
Butterick 5983, using bodice view A/C.
Butterick 5917, using the skirt from view C.
As you can see from the illustrations, the waistlines are completely different! 5917 is high-waisted, whilst 5983 sits at the natural waist. The alteration merely required moving the waist line up and easing the fabric around that seam since both of the patterns were from the same company. Pattern 5983 is a completely lined dress which I continued with the alternative skirt. The fabric for the dress is a two-way, horizontal stretch knit (not jersey) in a charcoal grey with what appears to be chalk lines built into the design and direction of the stretch. In truth, the "chalk lines" are slightly thicker and lighter color strands woven into knit, giving it a slight Braille feel. The lining is technically called stretch taffeta but neither looks nor feels like it. The bolt description is 100% nylon with PU coating. PU = polyurethane, meaning that the wrong side is coated with a water resistant finish whilst the right side is your regular 100% stretch nylon, shiny look. There is so much to say about this material that I will be creating a separate post just to cover how use and work with it.
Wrong side, PU coating on the left; right side, 100% shiny nylon on the right.
My main reason for using this type of fabric was that the horizontal stripping on the nylon matched perfectly with the charcoal stretch knit look; the "stretch taffeta" is also super light weight and both fabrics were stretchable. As such, the skin side to the lining was the softer, PU coated side so that the lines on the "stretch taffeta" could highlight the dress fabric. What I did not know was how tricky the fabric would be to work with nor the paucity of information about how to sew with 100% nylon PU coated stretch taffeta.
"Stretch Taffeta", aka 100% nylon with PU coating, and scale.
Just as a quick note, PU coated nylon is not the same as PUL (polyurethane laminate), which looks similar to vinyl, nor is the same as ripstop, water-resistant taffeta, polyethylene or even stretch taffeta (in the David Tuttera sense). The greatest difficulty I had in creating this dress was finishing the bodice back. In order to keep the lining from riding up, understitching was required. In and of it self, this is not difficult to do. However, the right angle turn between the bodice back and yoke gets quite bulky with four layers, even with trimming the seam allowance.
Back view bodice, dress side. Pleat basting stitches in place.
Back view bodice, lining side. Pleat basting stitches removed.
The other tricky part was sewing down the front flap to the back; specifically the evenness between the yokes to the center point/line and the gathering of the back flap front along the seam line. The first time I sewed this line, the sides were uneven and there was no gathering in the front, just one big pleat!
Bodice front dress side, on the shoulder.
Bodice front dress side, off the shoulder.
Bodice view lining side, off the shoulder.
It wasn't until I started sewing the side seams that there was any hint of this dress turning out correctly. I should also note that since I opted for stretch knit fabric in lieu of a dress requiring a zipper, the arm holes are larger than that illustrated in the instructions and most certainly will not line up were the side seam heights increased.
The front seam between yoke and bodice is about halfway down from the visible back arm hole seam. The arm hole should end at the line on the red dress form.
Once the bodice was completed to satisfaction, attaching the dress was a matter of basting it to the bodice and checking the fit before serging the lining, bodice and dress, with this seam being hidden/sandwiched between the dress and lining.
The end result is a great dress despite it's difficult beginnings.
Front view, dress side.
Three quarter view, back dress side.
Three quarter view, front dress side.
Front view, lining side.
Word to the wise, the "stretch taffeta" is NOT color fast! One of my older jersey camisoles turned a bit grey after being washed with this completed dress. Thankfully I do not wear this cami anywhere outside of the house.
Cost of materials: "Stretch taffeta" 4.25 yards (3.89 m) totaling $18.56, though only used 3 yard (2.74 m) so roughly $13.50 Ribbed stretch knit 3 yards (2.74 m) totaling $16.50 Guttermann 100 m spools (2), color #115 (charcoal grey), $2.38 Guttermann 200 m spool, color #10 (black), from stash 4 Serger cone threads, black, from stash, originally $4.30 Butterick patterns, from stash, originally $3.98 + tax Total Cost = $28.03, not including tax, patterns or serger thread but including 15% off coupon for fabric at time of purchase Date of purchase of fabric: 30 August 2013 ...Not bad for stash hoarding, only one year to make...
This has to be one of the quickest turn-arounds in my fabric stash: I bought the polka dot cotton jersey knit on the 8th of June this year during one of JoAnn's half off "Red Tag" fabric sales, 3.375 yards (3.0861 meters) for $12.44! The stretch is approximately 20% in the horizontal direction.
100% Cotton, Polka Dot Jersey Knit
I would have finished the garment sooner had I already had a set of twin sewing needles for the hem or known that I had the correct pressure foot to create a blind hem.
Butterick 5917 Graphic Representation
I left off the center ruffles, making view A bodice with view C skirt. I also added a tiny amount of gathering to the top of the sleeve. Given that this pattern was designed for non-stretch fabric, the main alteration was excluding the zipper, creating a regular flat seam there instead. The bodice is self-lined with the only exposed seams being the arm hole and waist. See more about this pattern here.
Truth be told, the most significant amount of time took correcting the bodice. I finally learned to make the dress a size smaller than my measurements given the two-way stretch knit jersey but forgot that this pattern had a raised waist before cutting the material. So what is the problem, you ask? I had the dress nearly complete, with a sergered waist (aka, the point of no return in putting this garment together), when I tried fitting the dress and found it to be quite loose in the torso. Attaching the skirt to the bodice had pulled down the bodice more than I expected. As a result of this, I had to move the bodice up two inches (5.08 cm) at the shoulders and the trapezoid insert down an inch; no easy task with all the seam ripping and resewing done solely through the open arm holes.
Bodice self lining.
Not as cute as I had thought, given the fabric choice with dress pattern. Perhaps you don't see that but for me, this particular look is: "midwest country cousin", "county fair", "wholesome girl" dress. I love the fit of the dress and will definently use this pattern again, just in a solid colour and maybe with lace edging instead of the ruffles. As it stands, I think this will become my house dress - great for doing chores around the house whilst not attired in my usual jersey grubbies: the type of look where you blush to open the door to find the good looking delivery man on your doorstep!
Cost of Materials: White on blue polka dot jersey knit, 3.375 yards (3.0861 meters) for $12.44 Guttermann 100% polyester thread, color #625, 100 m, 2 spools for $2.12 4 Serger cone threads, white, from stash, originally $4.30 Butterick pattern, from stash, original cost $1.99 + tax Total Cost = $14.56, for only those items I purchased recently (fabric and thread)
Welcome back to the land of the living! ...Stress from rejection, sewing frustration, finding out that I have gained enough weight in the past year to make the majority of my clothes below the waist feel tight, if not completely unwearable... in all, a sad state of affairs leading to little work done and no posting! I even got up to 4 mini pepsi's each day this past weekend. Ugh! In other news...
Wicked afternoon storm Tuesday, view south.
Major sewing needle haul at the unprecedented, 70% off notions, one day sale at JoAnn's this past Sunday. I probably would have purchased more notions had the flyer arrived before Thursday and I had more money. As it stands, there is only one item I regret not buying and when I tried to go back to the store in the afternoon for it, after a wicked thunderstorm ended, the product was out of stock. On the plus side, I did get six sets of twin needles and can finally finish three dress I have in the works.
However, twin needles on knit jersey, which are the majority of material I am working with right now, have a learning curve...and thank goodness for the internet! The first 10 trial runs of using the twin needles yielded this:
...a knotty, tangled mess that stops my machine. Thankfully, it hasn't torn the fabric and the front/top looks fine. This with a stitch length of 3 and above, and ease on the bobbin tension. Sadly most internet resources that talk about working with twin needles and jersey knit material do not cover more trouble shooting issues than the usual "it must be a tension or stitch length issue"! Perhaps their machines are wonderful and never give them this problem...though it is safe to say that none of those authors appeared to be using a Bernina.
As it so happens, I learned from Bernina's official website/videos that in order for the sewing machine to use the twin needles correctly, only one thread should be in the thread guide! Granted I have a different machine than the one presented in the video but same technique applies. The Bernina 801 Sport has been in my family for 27 years now and neither my Mother, the original owner, nor myself, the current owner since she upgraded to a fancy-smanchy computerized sewing machine, have known this tiny and very significant piece of information.
Here's my Bernina 801 Sport illustrating the solution. ---------------------->
Watch the original video
Other wonderful things I have learned upon my research and experience include:
1. Stretch taffeta, if indeed it is the correct label for the material, whilst lovely to the touch, is a huge pain in the ass to work with and very temperamental! Finding the right needle that will not entirely kill my machine or fabric is tricky and there appears to be very little online information about other people working with this fabric.
2. Rereading the flat bolt tag information, it would appear that the stretch taffeta I am using as lining is defined as 100% nylon with PU coating (yes, that is what it says, PU coating). Apparently the PU stands for polyurethane and helps make the fabric waterproof; uses include outdoor gear (clothing, packs, sleeping bags, etc), lingerie and even sandwich baggies. ...A quick Google search of the fabric indicates that home sewers have not utilized this fabric or if they have, the information is well hidden. Strangely Ebay had the best resource with their Guide to Sewing Water Repellent or Waterproof Fabrics. Here's what I took from it: a. Once the material is punctured, either by pins or needle, it leaves a hole where water can get in. Pin above the seam allowance, if you must pin. Holes can be covered with sealant but who wants sealant on an every day garment. b. Use sharp needles and change them often. c. "Most coated fabrics will not fray and do not require serging, pinking or finishing. Lighter nylons and uncoated fabrics will however fray quite easily and should be finished." The text does not say explicitly how the fabric should be finished. d. "Increase your stitch length (for fewer holes) and increase your tension slightly. As with any project, sew a test swatch first." Increasing the tension is not something I would have considered.
3. I also found the following to be quite pertinent to my current projects with the jersey knit material. According to the user plrlegal on "Sew What's New" message board (last comment on the first page):
I actually would use a 3-3.5 mm stitch (8-10 stitches per inch on my Pfaff 4.0) and a silk wrapped polyester thread. Taffeta is one of the fabrics that if you use small stitches on it, it will tend to pucker, especially with polyester thread that has been tightly wound at high speed onto a bobbin. Polyester thread is one of the threads when tightly wound a high speed onto a bobbin will stretch and then when it is sewn into a seam will shrink back to its original length, thus causing the puckering in garment seams. If it is at all possible, you should wound polyester onto a bobbin at a lower speed to prevent stretching.
...Of all the books I own on sewing, I do not know if any of them cover this. Then again, I have not read them all cover to cover. There are three dresses I am currently working on and that I need to finish by the beginning of next week, as I would like to focus on truly completing the Getting and Cleaning Data course offered by Johns Hopkins on Coursera. I have had such difficulty with this subject previously that I think I will devote most of my energy in August to this one class, enrolling in no other.
Tuesday's artistic sunset, view northwest.
I have much to learn! 'Til next time. This has been Young Grasshopper, signing out.
Summer is close to half way over and the heat has really been zapping my energy. On the plus side, Albuquerque finally got more rain on 16th of July than it has in 80 years!! The previous record was set in 1933 at 0.71 inches. That may not sound like a lot but in a high desert in a drought that is a ton of water. Read more about it here and here.
Typical late afternoon storm brewing over ABQ; View: east southeast from my patio.
As to activities, I am almost finished with two dresses...just need to find double/twin jersey needles for the hems. Finally finished Irish Sagas and Folk Tales by Eileen O'Faolain and am now reading Ross Poldark by Winston Graham, which is a much easier read than the former. I have done a little bit of knitting but nothing on the Aran sampler. Also got more of the Patons Silk Bamboo yarn for $3.00 per skein, which nearly 60% off the original price, as JoAnn's was clearing out their stock!
Swagbucks earnings have been going well and something I let the computer do while working on one of the many projects. This months points will focus on Amazon books...but I think I mentioned that in the last post. I have attempted to retake the Johns Hopkins Coursea course "Getting and Cleaning Data" but cannot get the data into R properly. Thankfully this course repeats next month but this is frustrating me to no end as I cannot move forward with their other classes I wish to take. This is probably why I am drinking more mini pepsis than I should be. I am up to 3 - 4 a day! Not good. :( With any luck I will get more done before the start of the Outlander series.
Finally...FINALLY...completed The Story of French by Jean-Benoit Nadeau and Julie Barlow this Thursday. By the end, it felt like I had been reading this book since the beginning of the year. Sadly, as my library receipt shows, I have only had the book checked out for close to 2.5 months. Just take a look at my reading progress/updates from Goodreads.com, starting from 18 May to 11 July.
Hard to read but "pages read" are on the y-axis, "date" on the x-axis.
Having taken so long to complete I thought I might write something about it. All page references refer to said text. I picked up this book hoping to read more about the development of French and how Cajun varies significantly from it. The short answer is that after the Acadians were forced out of Arcadia, now Nova Scotia, to Louisana, the Acadians became effectively isolated, linguistically speaking. "Since 1763, French Canadians lived a kind of linguistic Lost World" (p. 213). According to Nadeau and Benoit, the next French ship to arrive in Quebec wouldn't be until 1855, "ninety-two years after the end of the French regime" (p. 213). It would seem then that Cajun is closer to the last court French than modern French. And that would be the most interesting point on the Cajun language in the whole book. Sadly, the remainder of the chapter talks more about the conflicts in maintaining French and little about the linguistic differences, with half of the chapter also devoted to the isolation of French in Quebec. Did I mention that I had to wait until chapter 10 to get this tid-bit?! Truthfully, getting to chapter 10 was not so hard nor any less engaging. Indeed I learned some very useful points that should be shared:
If you wish to take over a country, do so by cultural assimilation and educate the masses.
Education of a new foreign language is best done through translation from the mother tongue, especially when you have few native speakers of the new language available.
French was born out of a mixture of Latin, Frankish and other Germanic languages after the 10th century (p. 28).
England spoke Norman for four centuries after 1066 and it was not until Henry IV that an English king spoke English...but, linguistically, French and English still help each other out (p.30-31).
"Starting in 1967, most American universities suppressed the mandatory foreign language tests for Ph.D. candidates" (p. 288).
"Diplomats constantly try to keep the playing field slanted their way when they have the upper hand, or to level the playing field when they are at a disadvantage" (p. 290).
Places with library and health services for a community increase national exam scores 3-4 times than those places without. At least in Burkina Faso. (p. 348)
Oxytonism - when "the stress in words (fall) on the last syllable and, in sentences, on the last word" (p. 369). Penultimate - stress on the second-last syllable (p. 370). A change in French that has been occurring since the end of World War I, from former to latter. (...This is probably why all of my antiquated French textbooks were so cheap.)
You cannot afford to successfully run a country without a ministry of culture or some sort of cultural protection. "...Quebec knows that if it doesn't make its own cultural products, someone else will, and they will inevitably be imports" (p. 411-412).
We really have Francois I, late 15th Century French ruler, to thank for kick-starting French into what we know of it today (p. 51-52).
The majority of the book is about France's and francophone countries' use of French than the nuances of linguistic variability. It is worth a read but I must warn you, as I have seen other reviewers who have come before me, the last third of the book tends to drag on. Fortunately, the chapters are nearly self-contained so if you thus desired, you could skip around and read only those chapters that interest you. As to learning more about Cajun language and people, I will have to seek other works outside my state's meager public offerings on the subject.